Hanging Spice Shelf
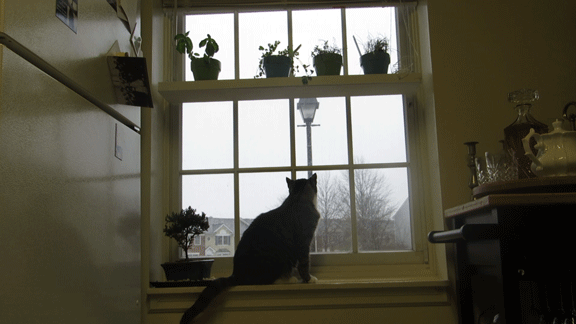
Our cat, Bailey, loves many things: boxes, bags, anything tossed up or down stairs, sorting laundry, yarn, watching me play piano (then helping me on the low notes... that I don't need to use but she tries), football season, and sitting in the kitchen window sill. Of all those things, it's the act of sitting in that window sill and watching the birds, people and precipitation which she does the most. So when Justin bought me a spice garden for my birthday, I knew the best window to put those plants in for the best sunlight possible was also Bailey's favorite perch. I was a little heartbroken really: I've always wanted a nice spice garden, but I have a black thumb, so the plants need all the sunlight and prayers and help they can get to even survive under my care. )

So I set to making a plan to allow the plants to get the light supplied by that window but also allow my cat to sit on the sill.
Thus, Hanging window spice shelf! It's been hanging now for a few months and I can safely say it works great!! I can open and shut the blinds and the window, the cat doesn't disturb it, and it doesn't disturb the cat. All is right in my kitchen.
So here's the thing about this project: it's made by a proud woman who had to go to the home supply store by herself in her business clothes and heels to pick up supplies and felt completely awkward about being there because of the stares of condescension and patronizing "do you need help with anything, miss" which she gets all the time as she's looking at lumber to the extent that she always answers "no I can handle it" even if she really does need help with something. * sigh * So, that all to be said, these supplies are intended to get you in and out of your home supply store as quickly as possible so you don't have to ask anybody for help. Call it a flaw, but unless you're in the paint department or the gardening section, it's weird for a girl to be in the hardware section. At least I think so. It's like a guy roaming around the precious moments section of Hallmark. Sure: it's a sexist and outdated component of our society, but whatever, the long and short of it is that however awkward, we just have to do it because ultimately I'm not going to let any of that stand in my way to getting a project done that I want to get done....I'm just going to try and do it fast.
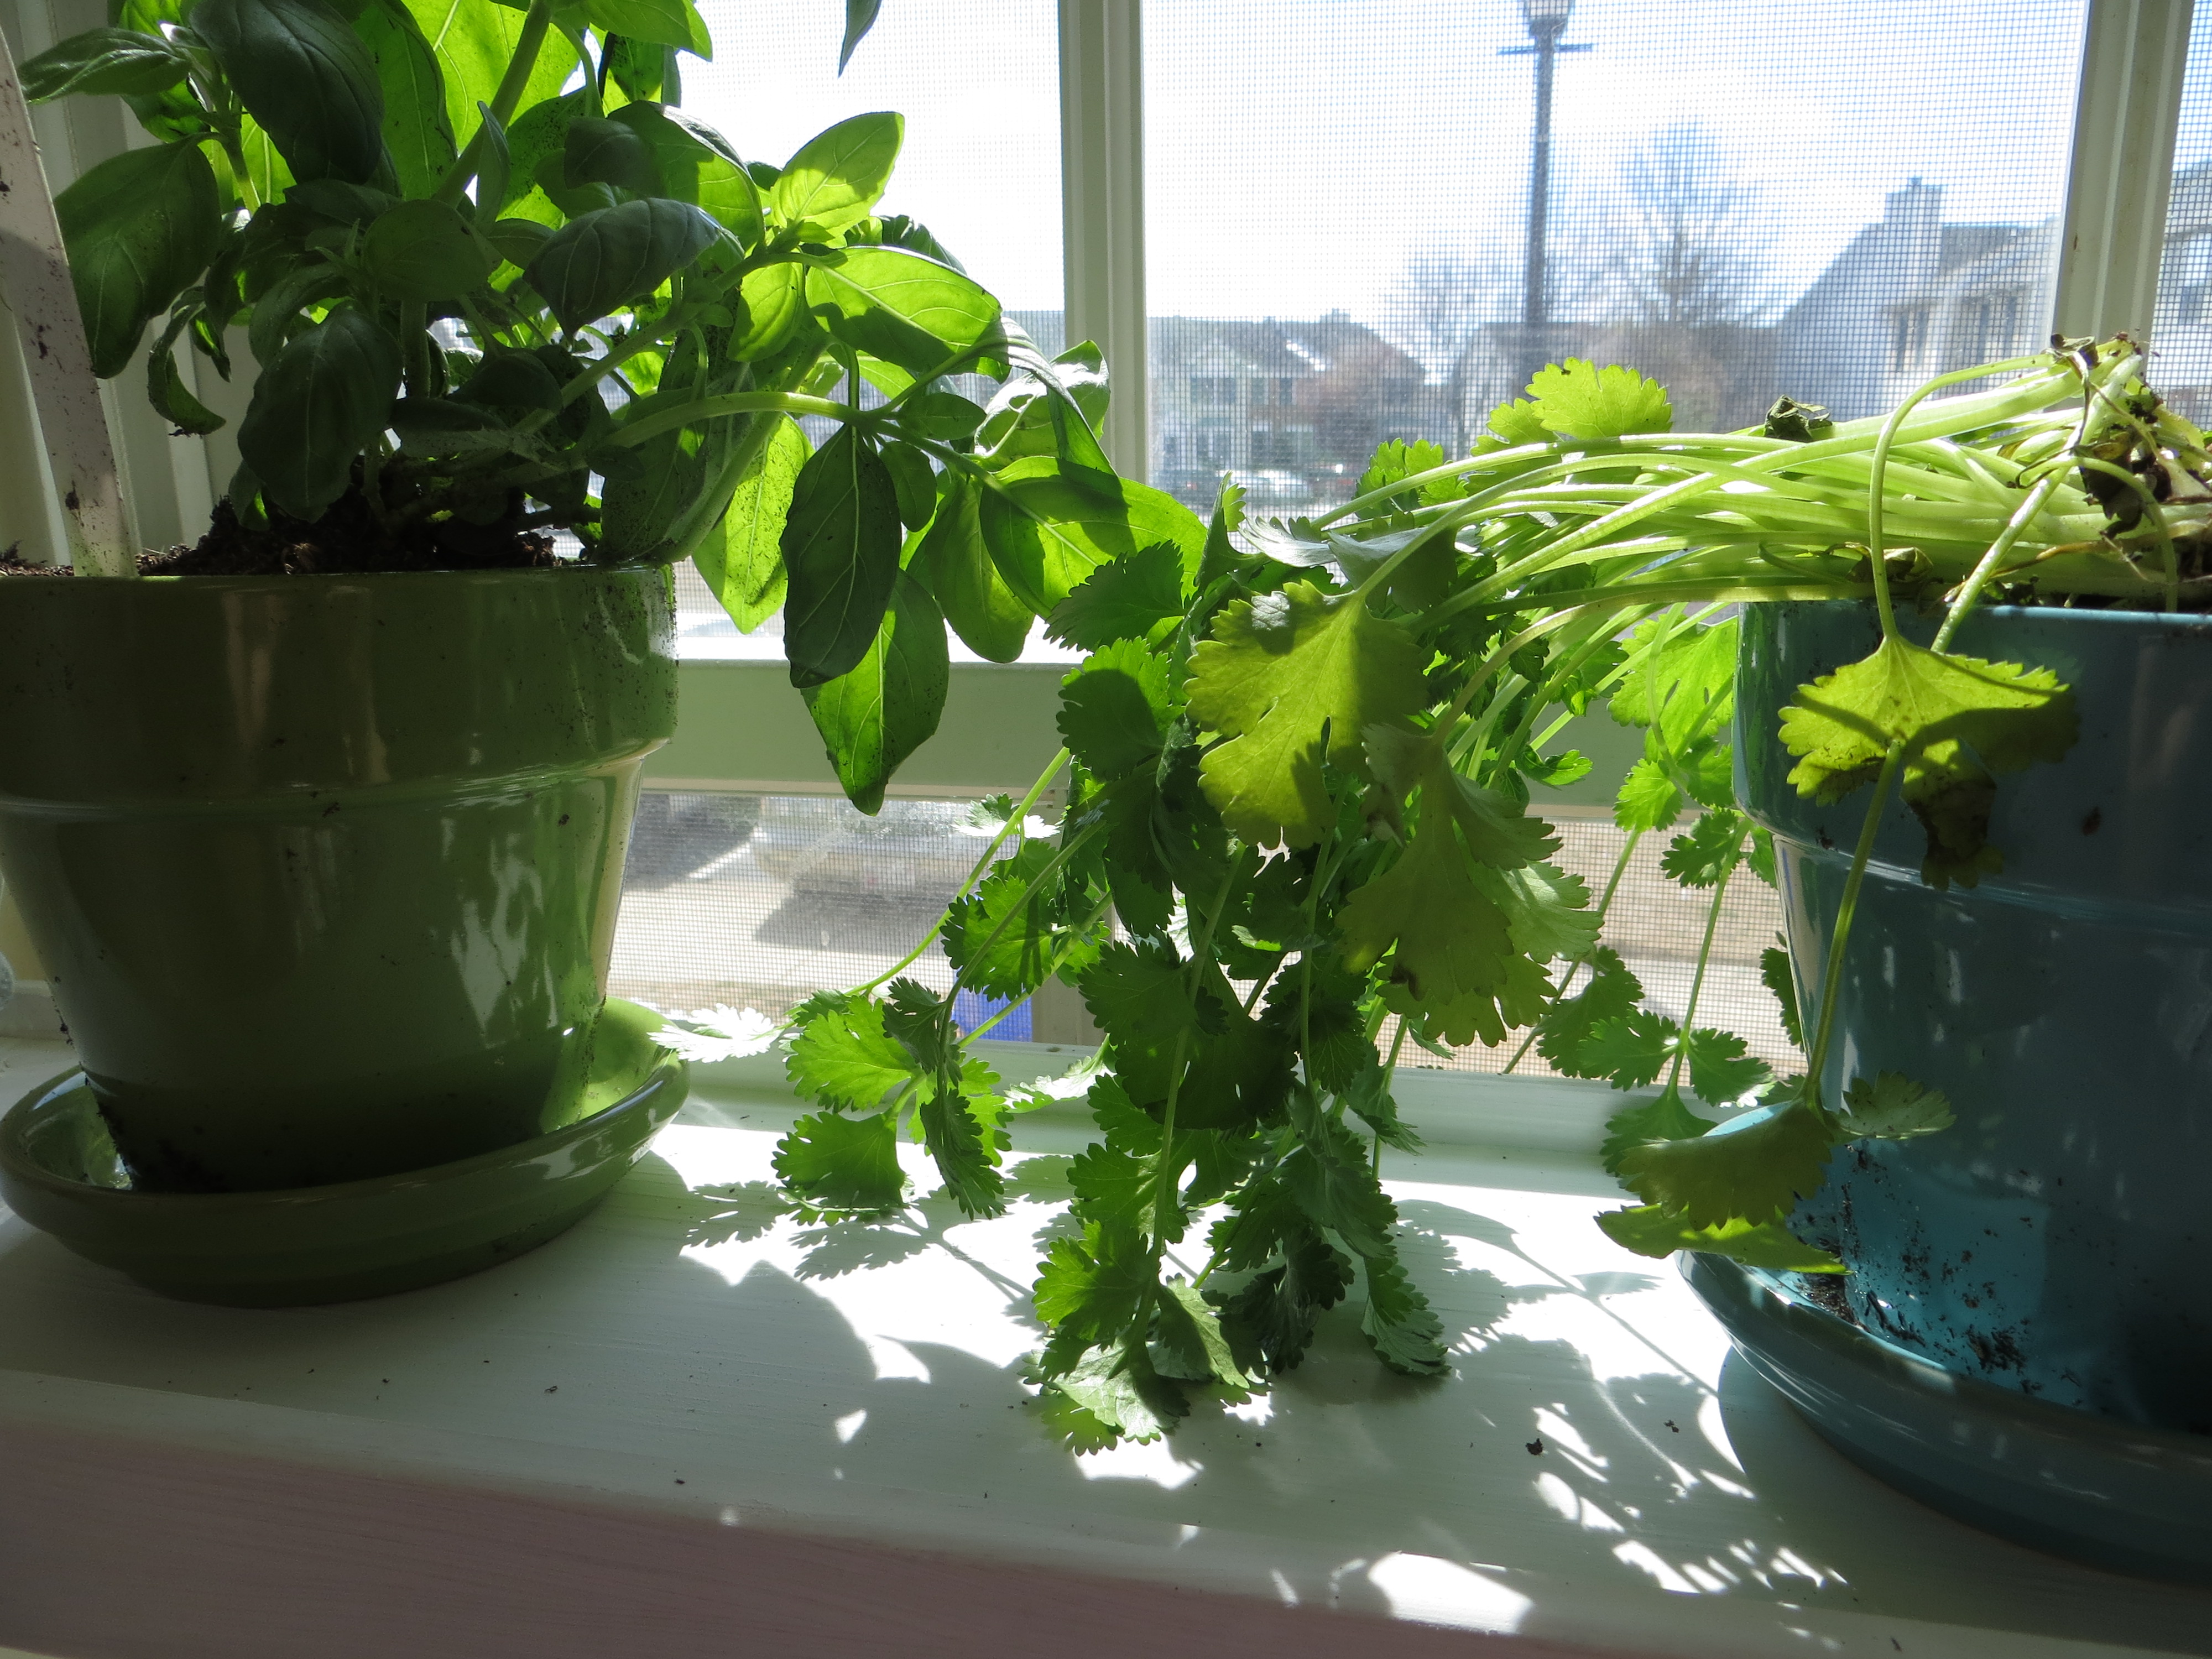
One last note: these instruction were made specifically for a shelf to be hung in a standard 3 foot wide window with a 7.5" frame and 8" sill. It is meant to hold four 4" Pots and saucers. Should you want to make this for a larger or smaller window, specifications will need to be changed to accommodate your project. Any windows with a smaller frame, such as many standard 3" frames and 3.25" sills, would need a smaller Piece A and much smaller pots to fit on that shelf. This project, therefore, may not be suitable for windows with smaller frames and sills.
Here are the supplies you'll need (assuming you have the tools, pots and plants already but none of the supplies or hardware, this will cost you about $30):
Tools you will need:
- Hammer (you'll see I use a dead fall Hammer from the pictures - thats just because it was already sitting upstairs when I was working on this and was too lazy to get the regular hammer from downstairs. Point is: any hammer will do).
- Measuring tape
- Saw (hand saw is fine, that's what I used)
- Pencil, pen, marker, crayon, a bit of ketchup (something to mark the wood with when you go to cut it)
- Electric Drill (you would survive without this, but it helps you get the holes started when you're screwing the hooks into the stud)
- Stud finder
- Wire cutters
- Pliers
Supplies you will need:
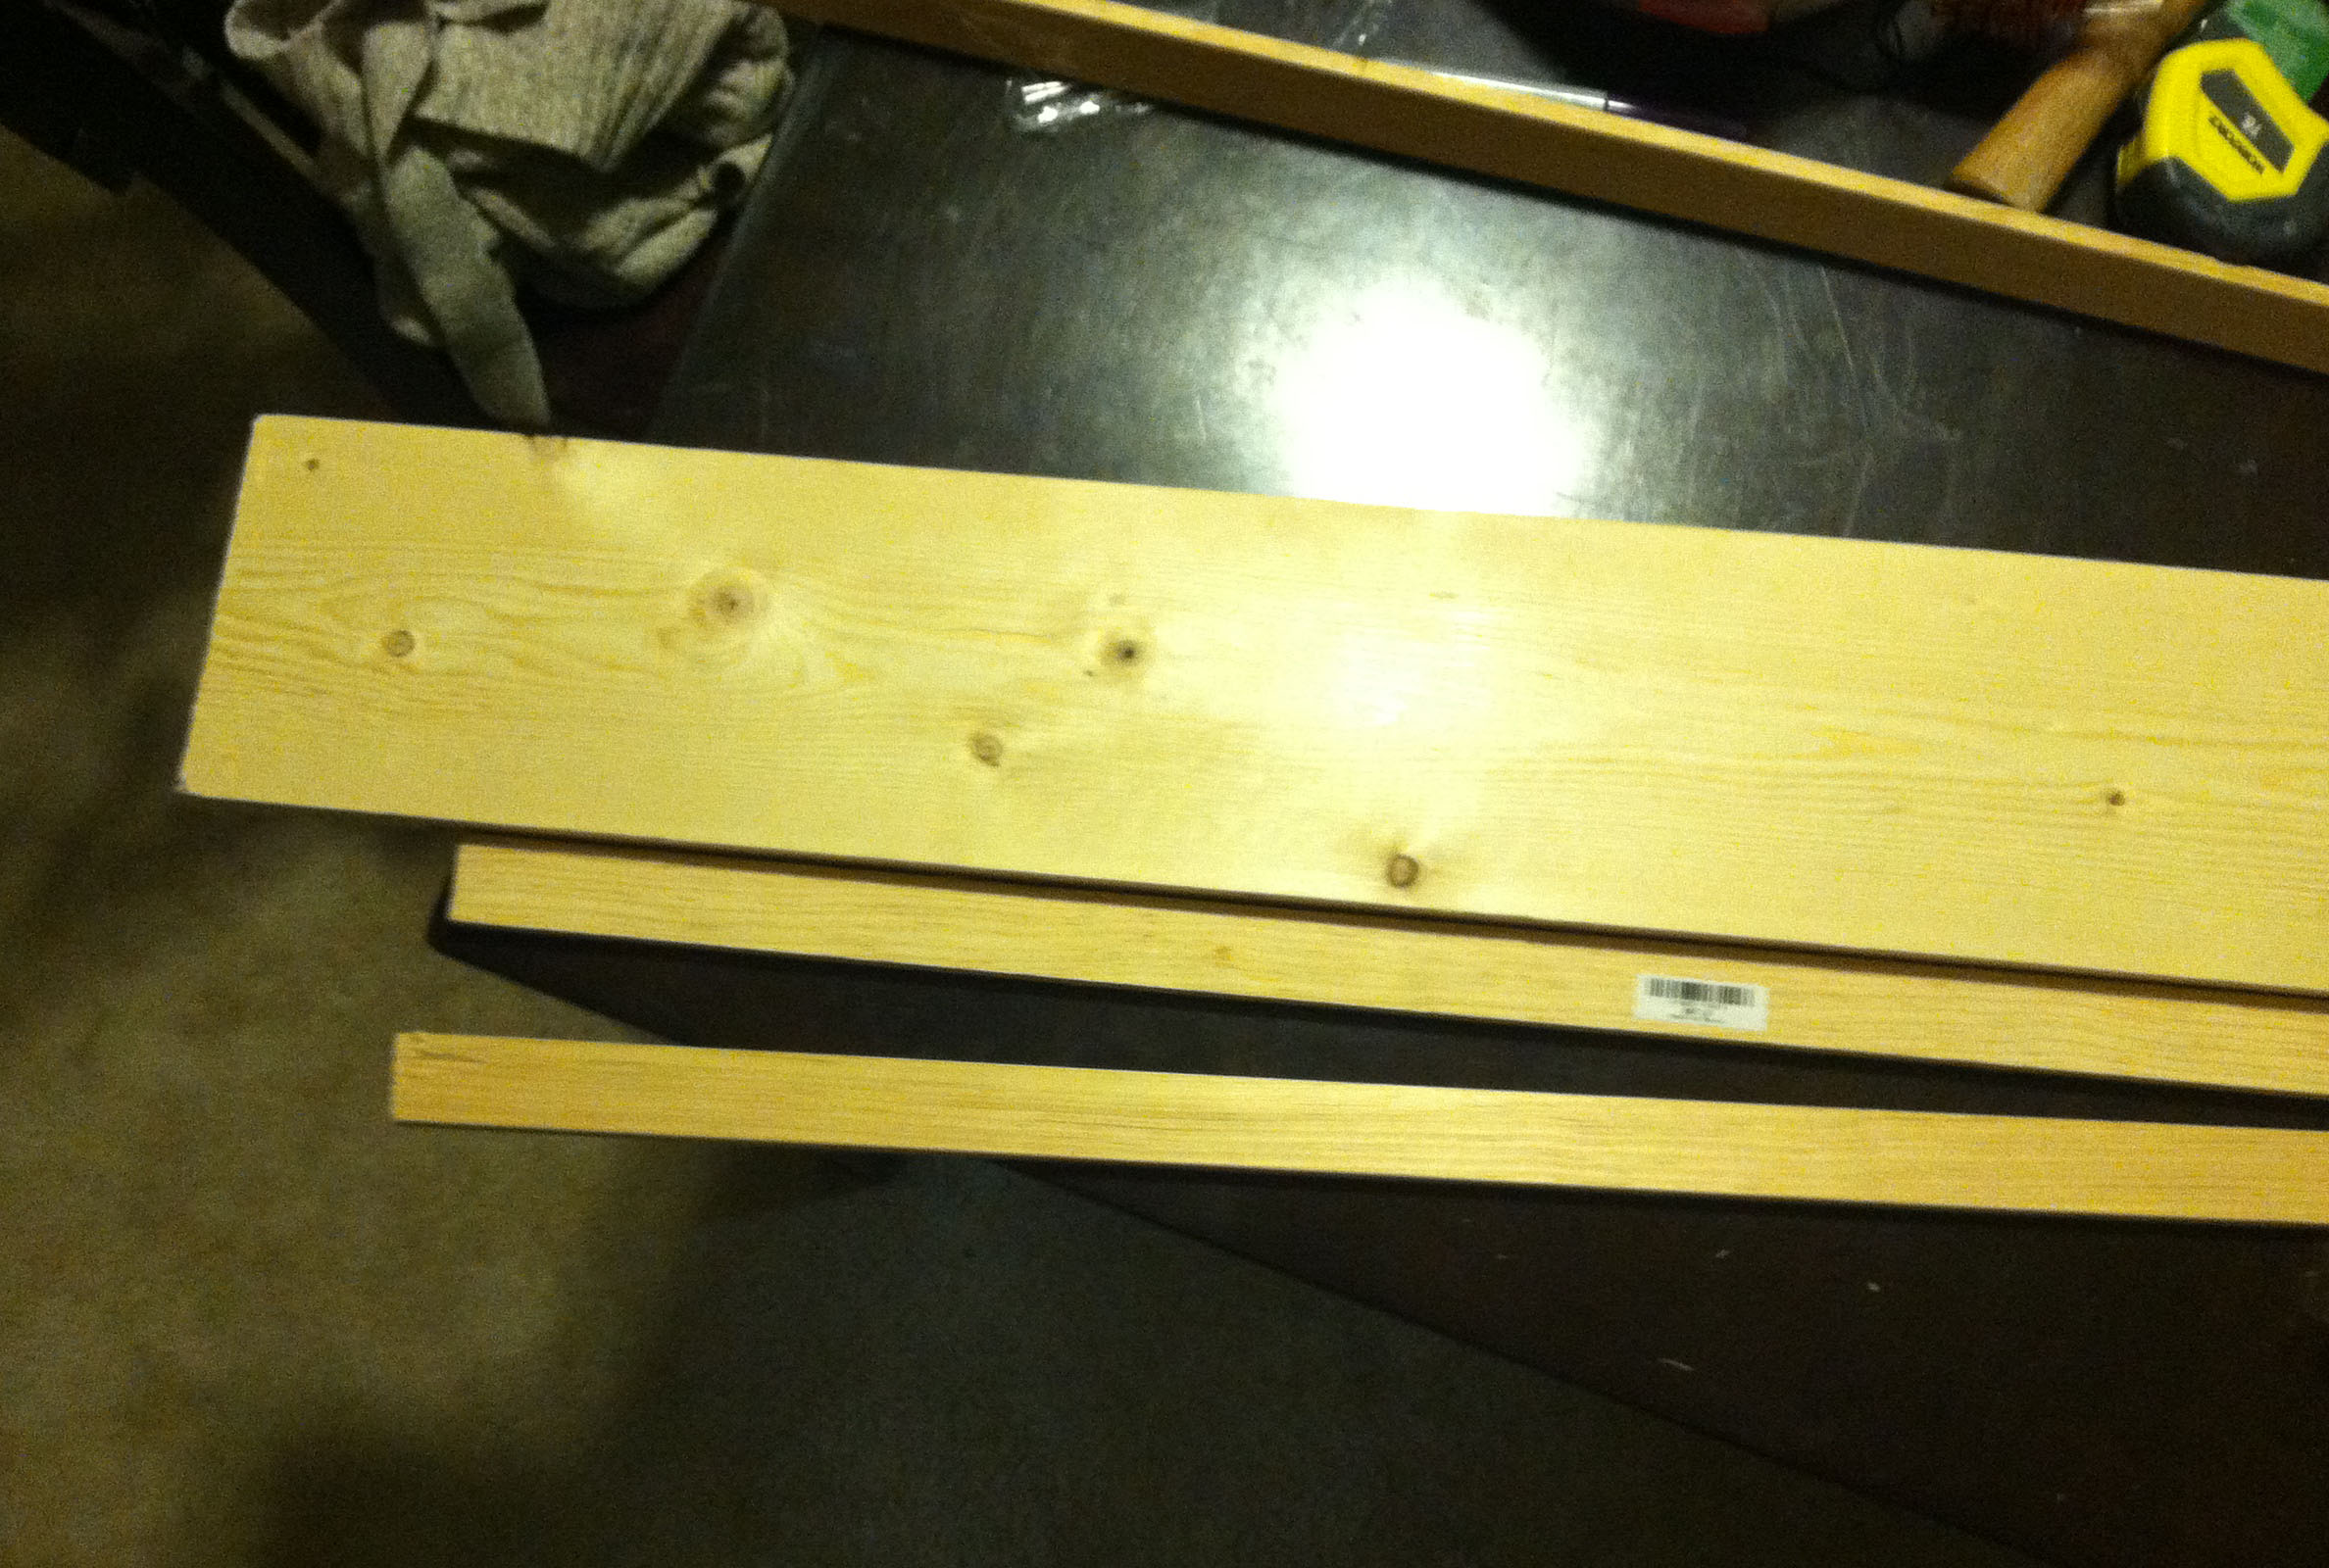
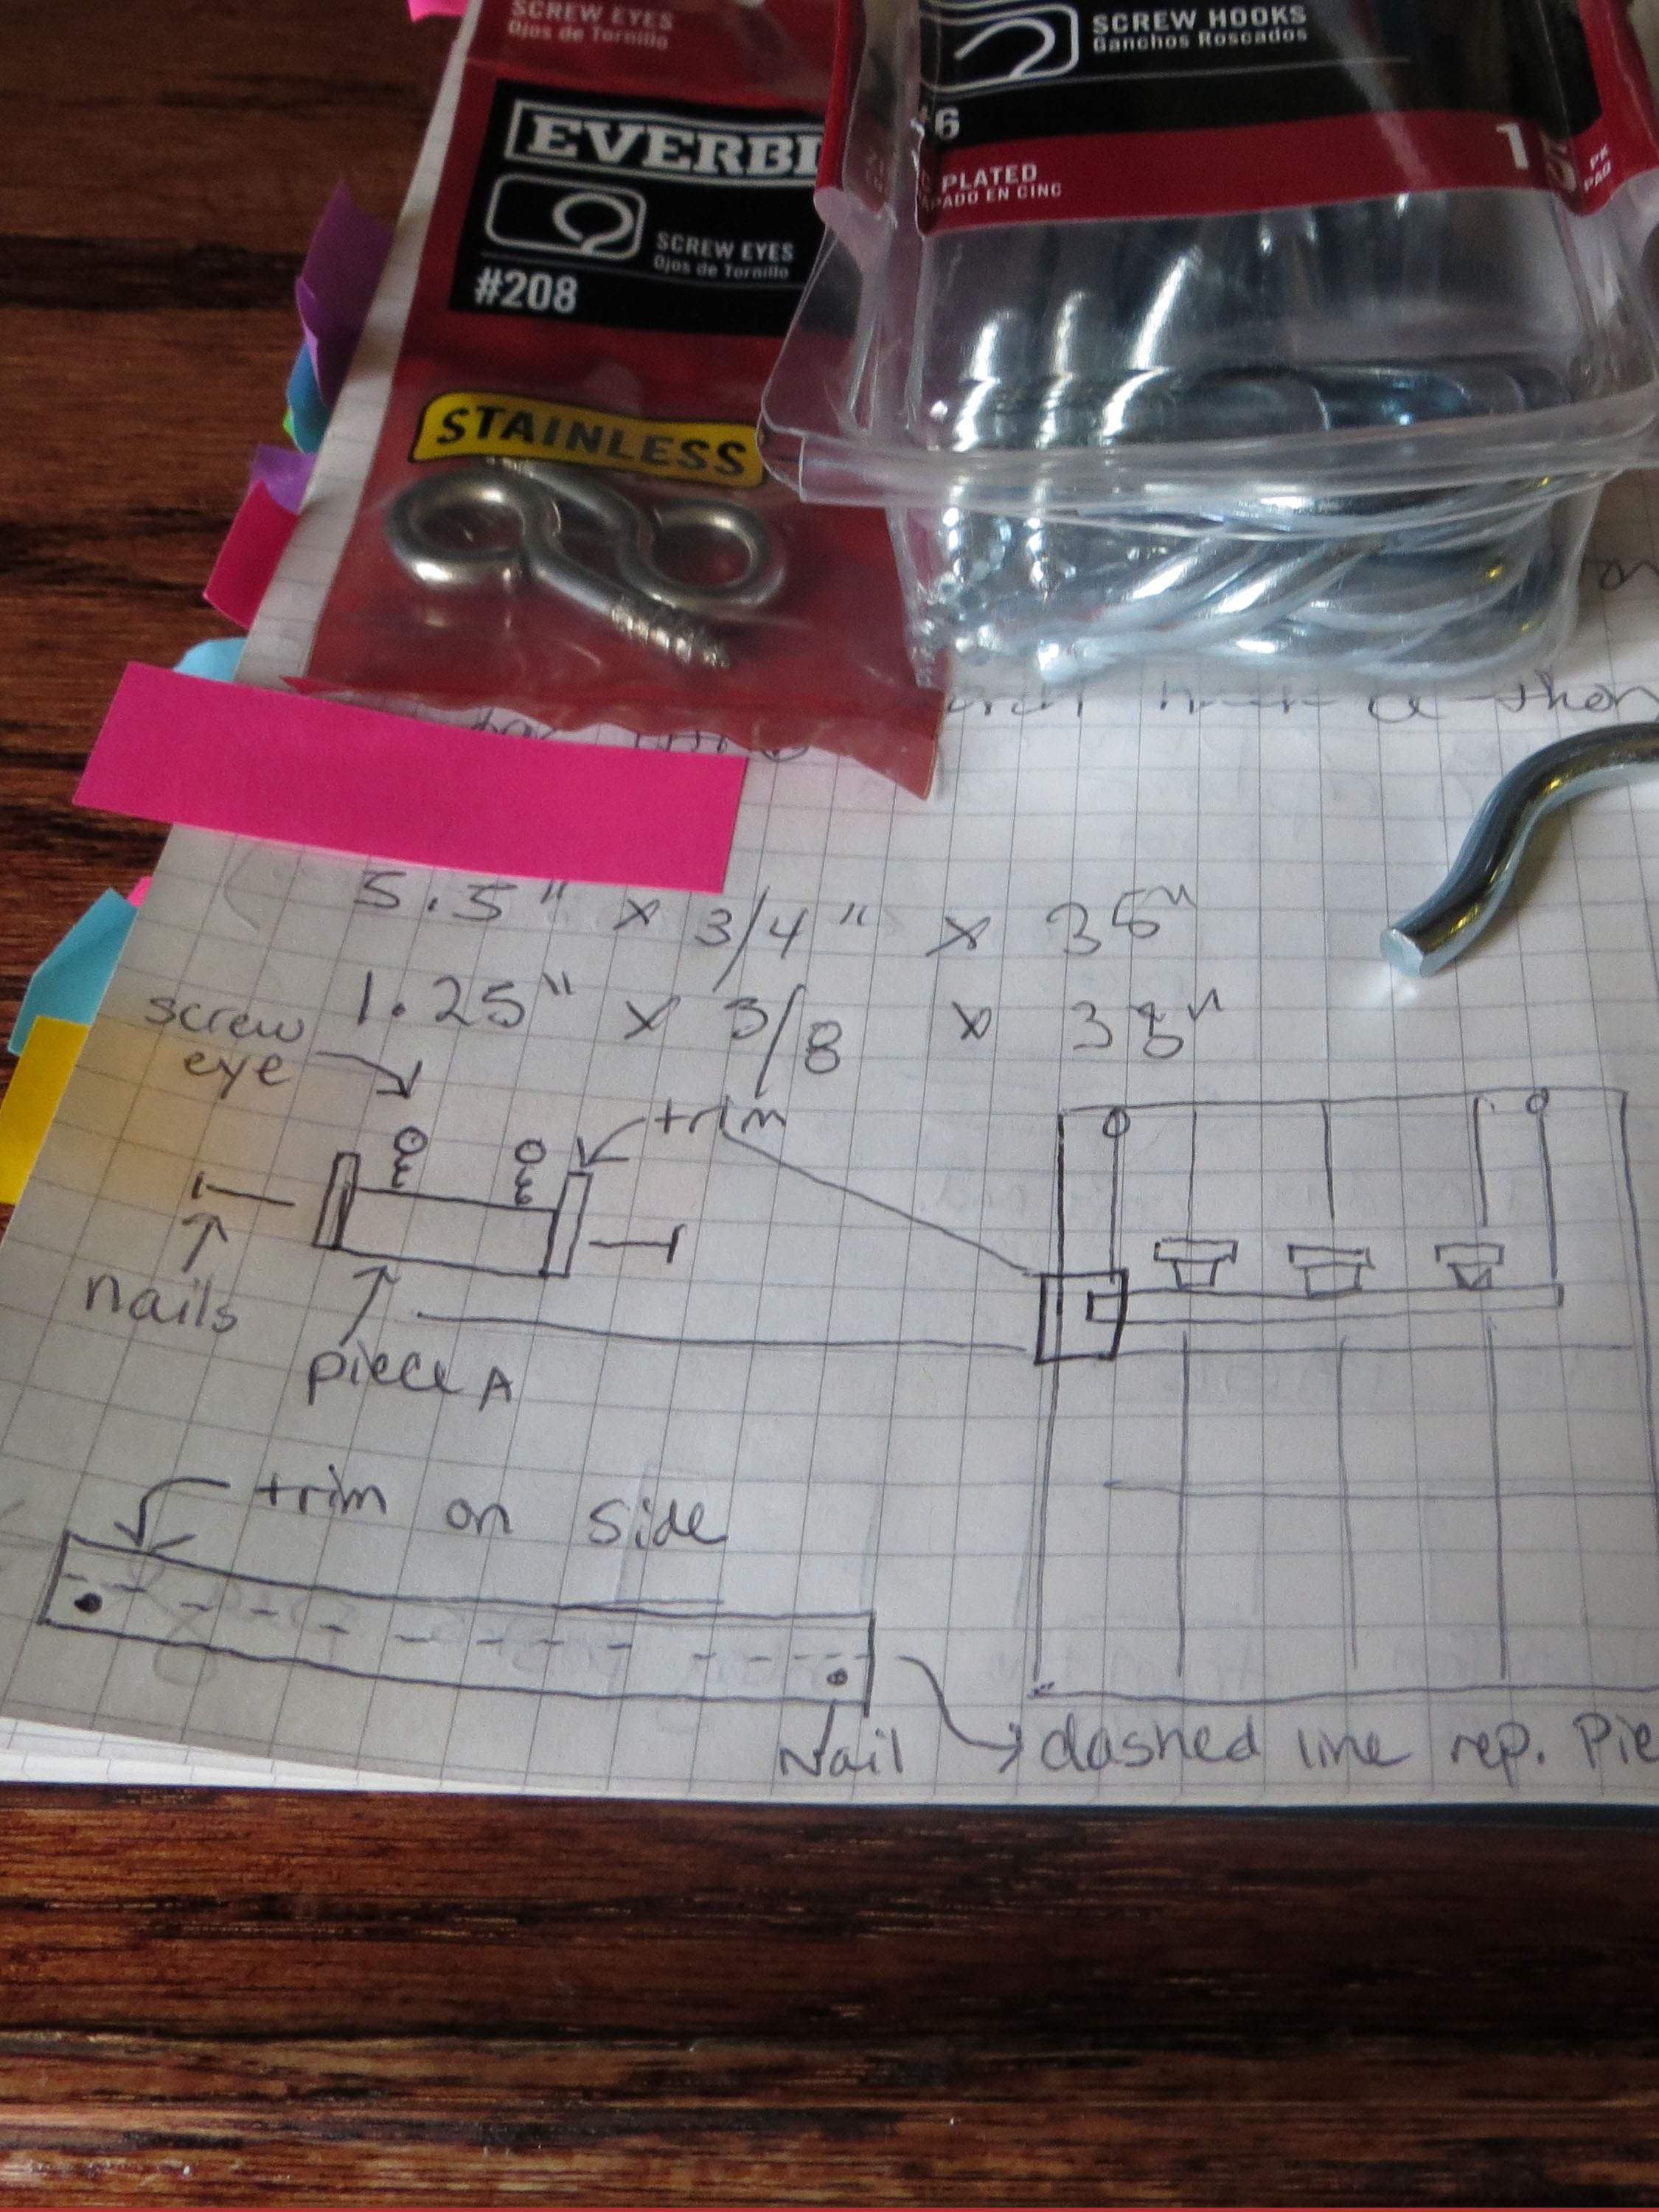
- 1 wood board measuring 5.5" wide by 3/4" thick by 35" long (this last measurement may need to change depending upon your window width)
- 2 pieces of basic wood trim each measuring 1.25" wide by 3/8" thick by 35" long (these typically are sold in 10' pieces and so if you just pick up one 10' piece you can cut it at home).
- Paint or stain in chosen color (optional, you can just leave it as the wood color if you like)
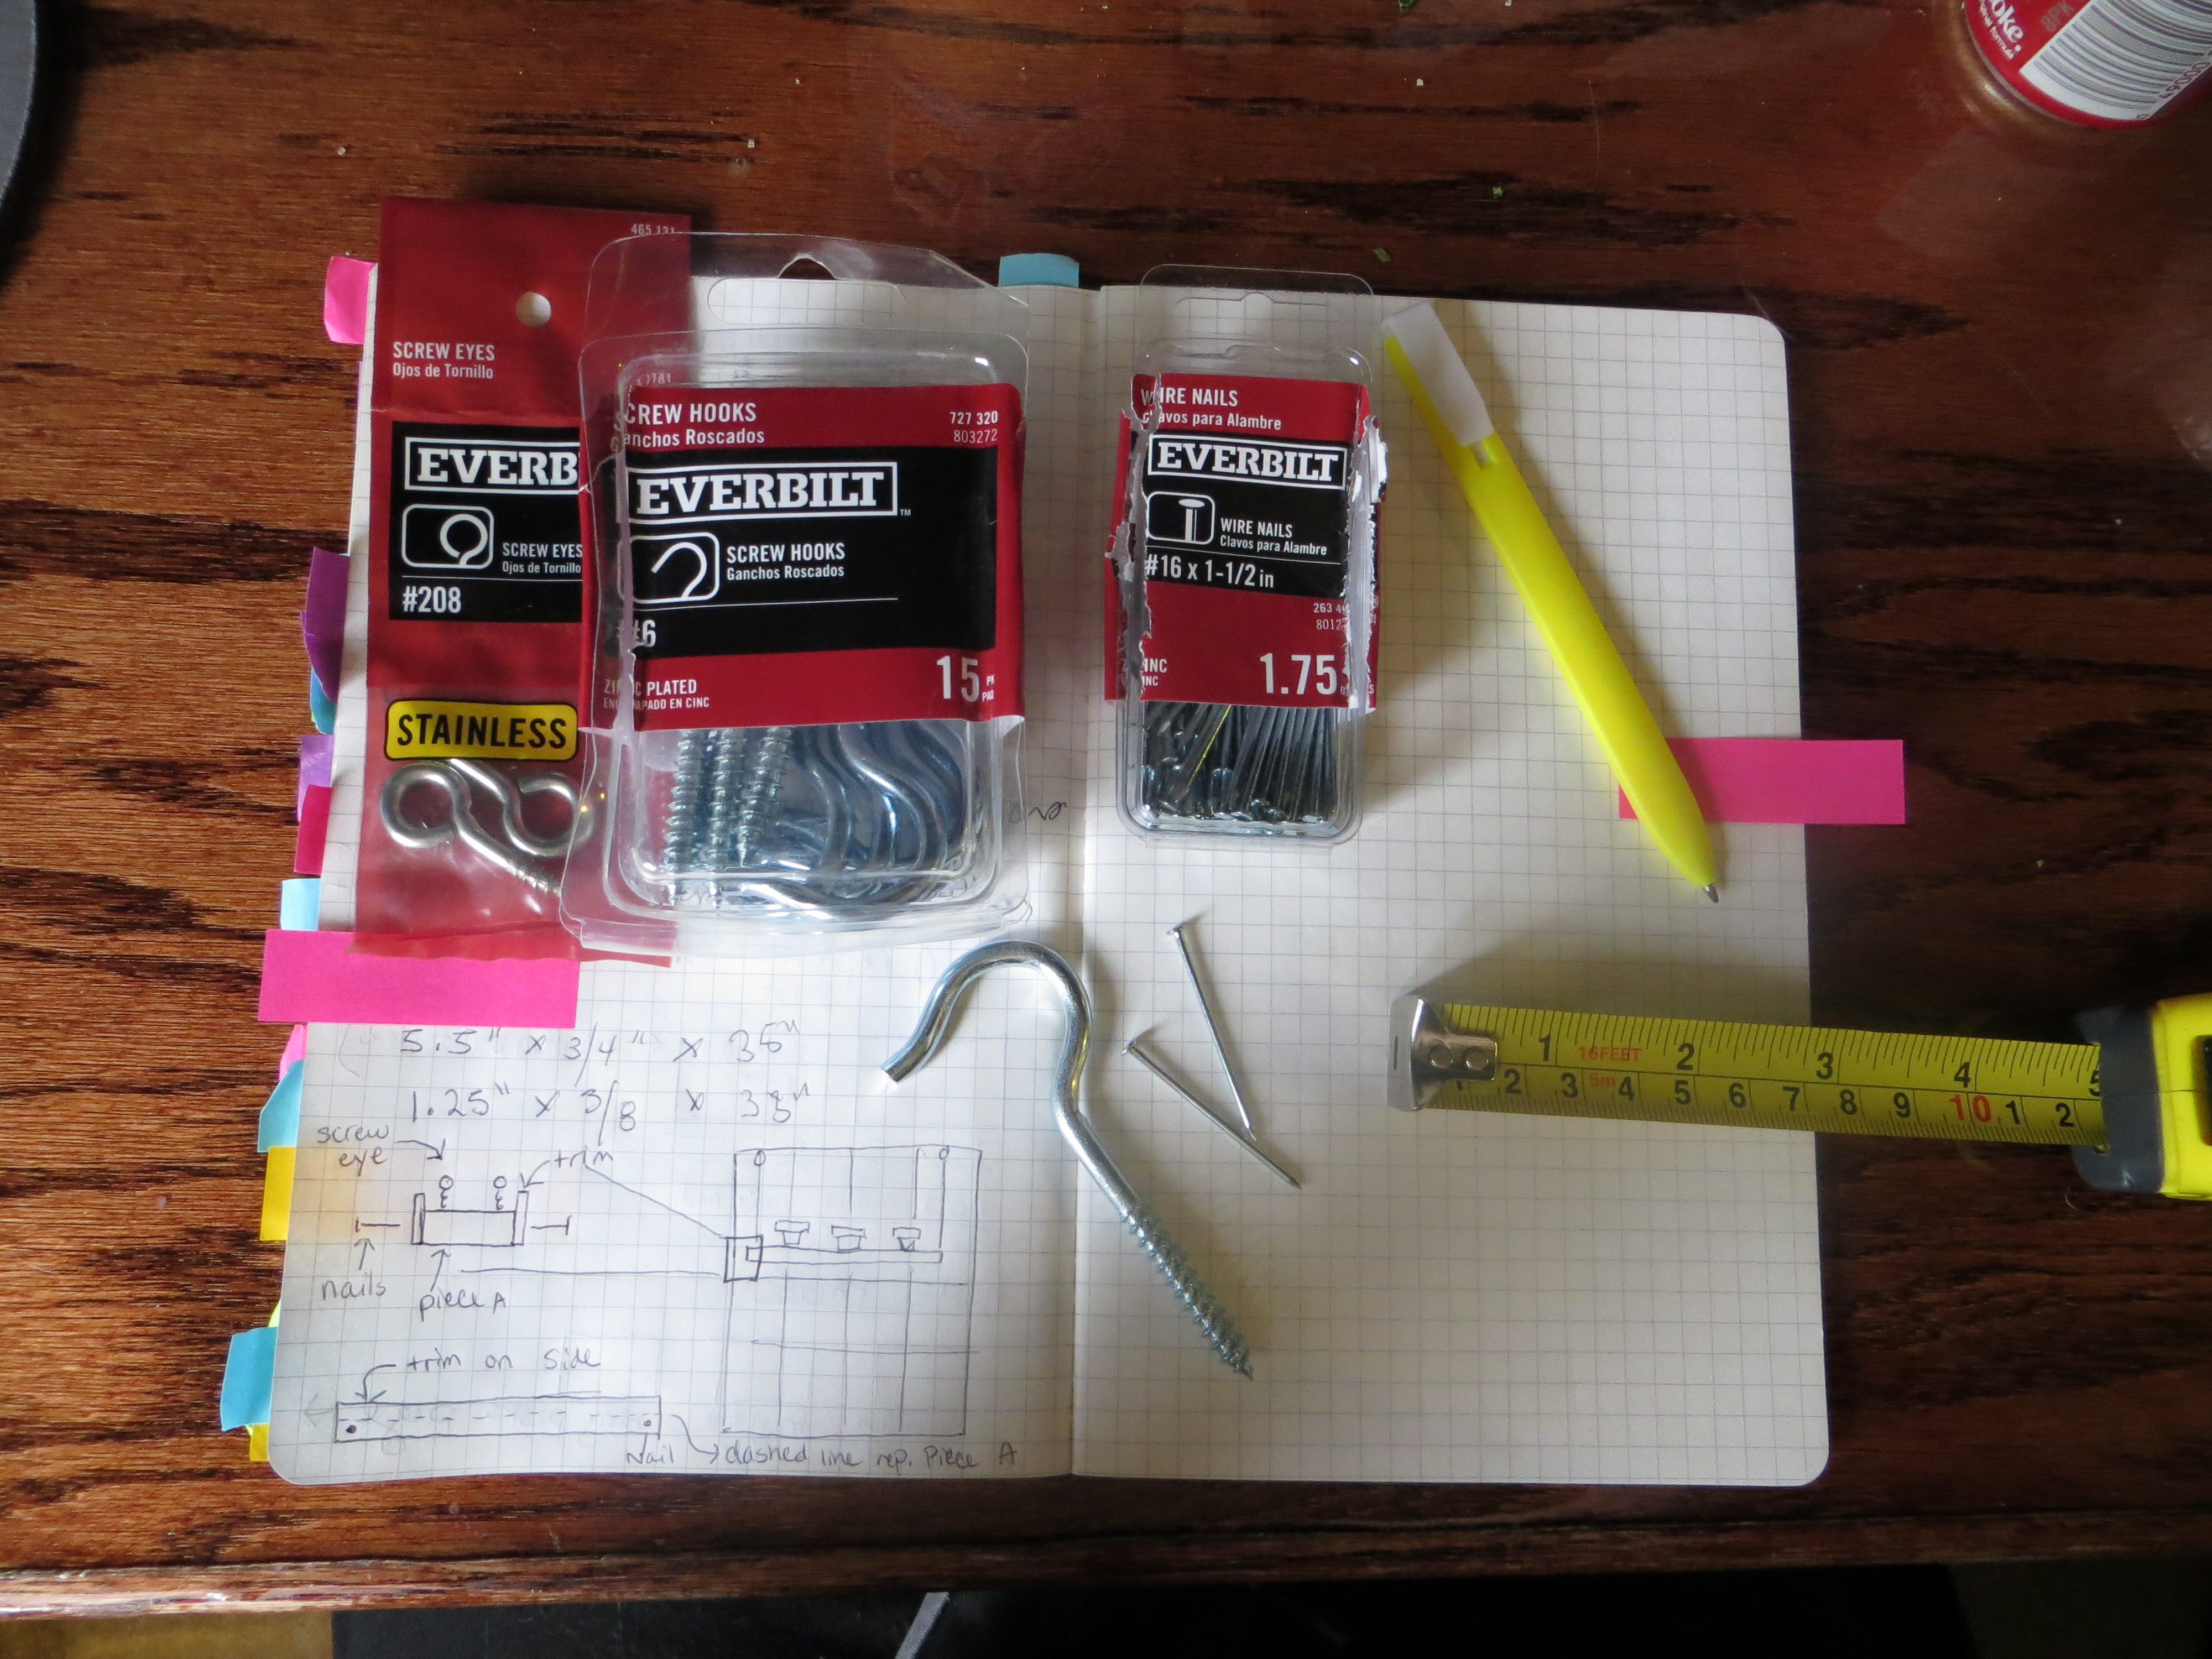
Hardware:
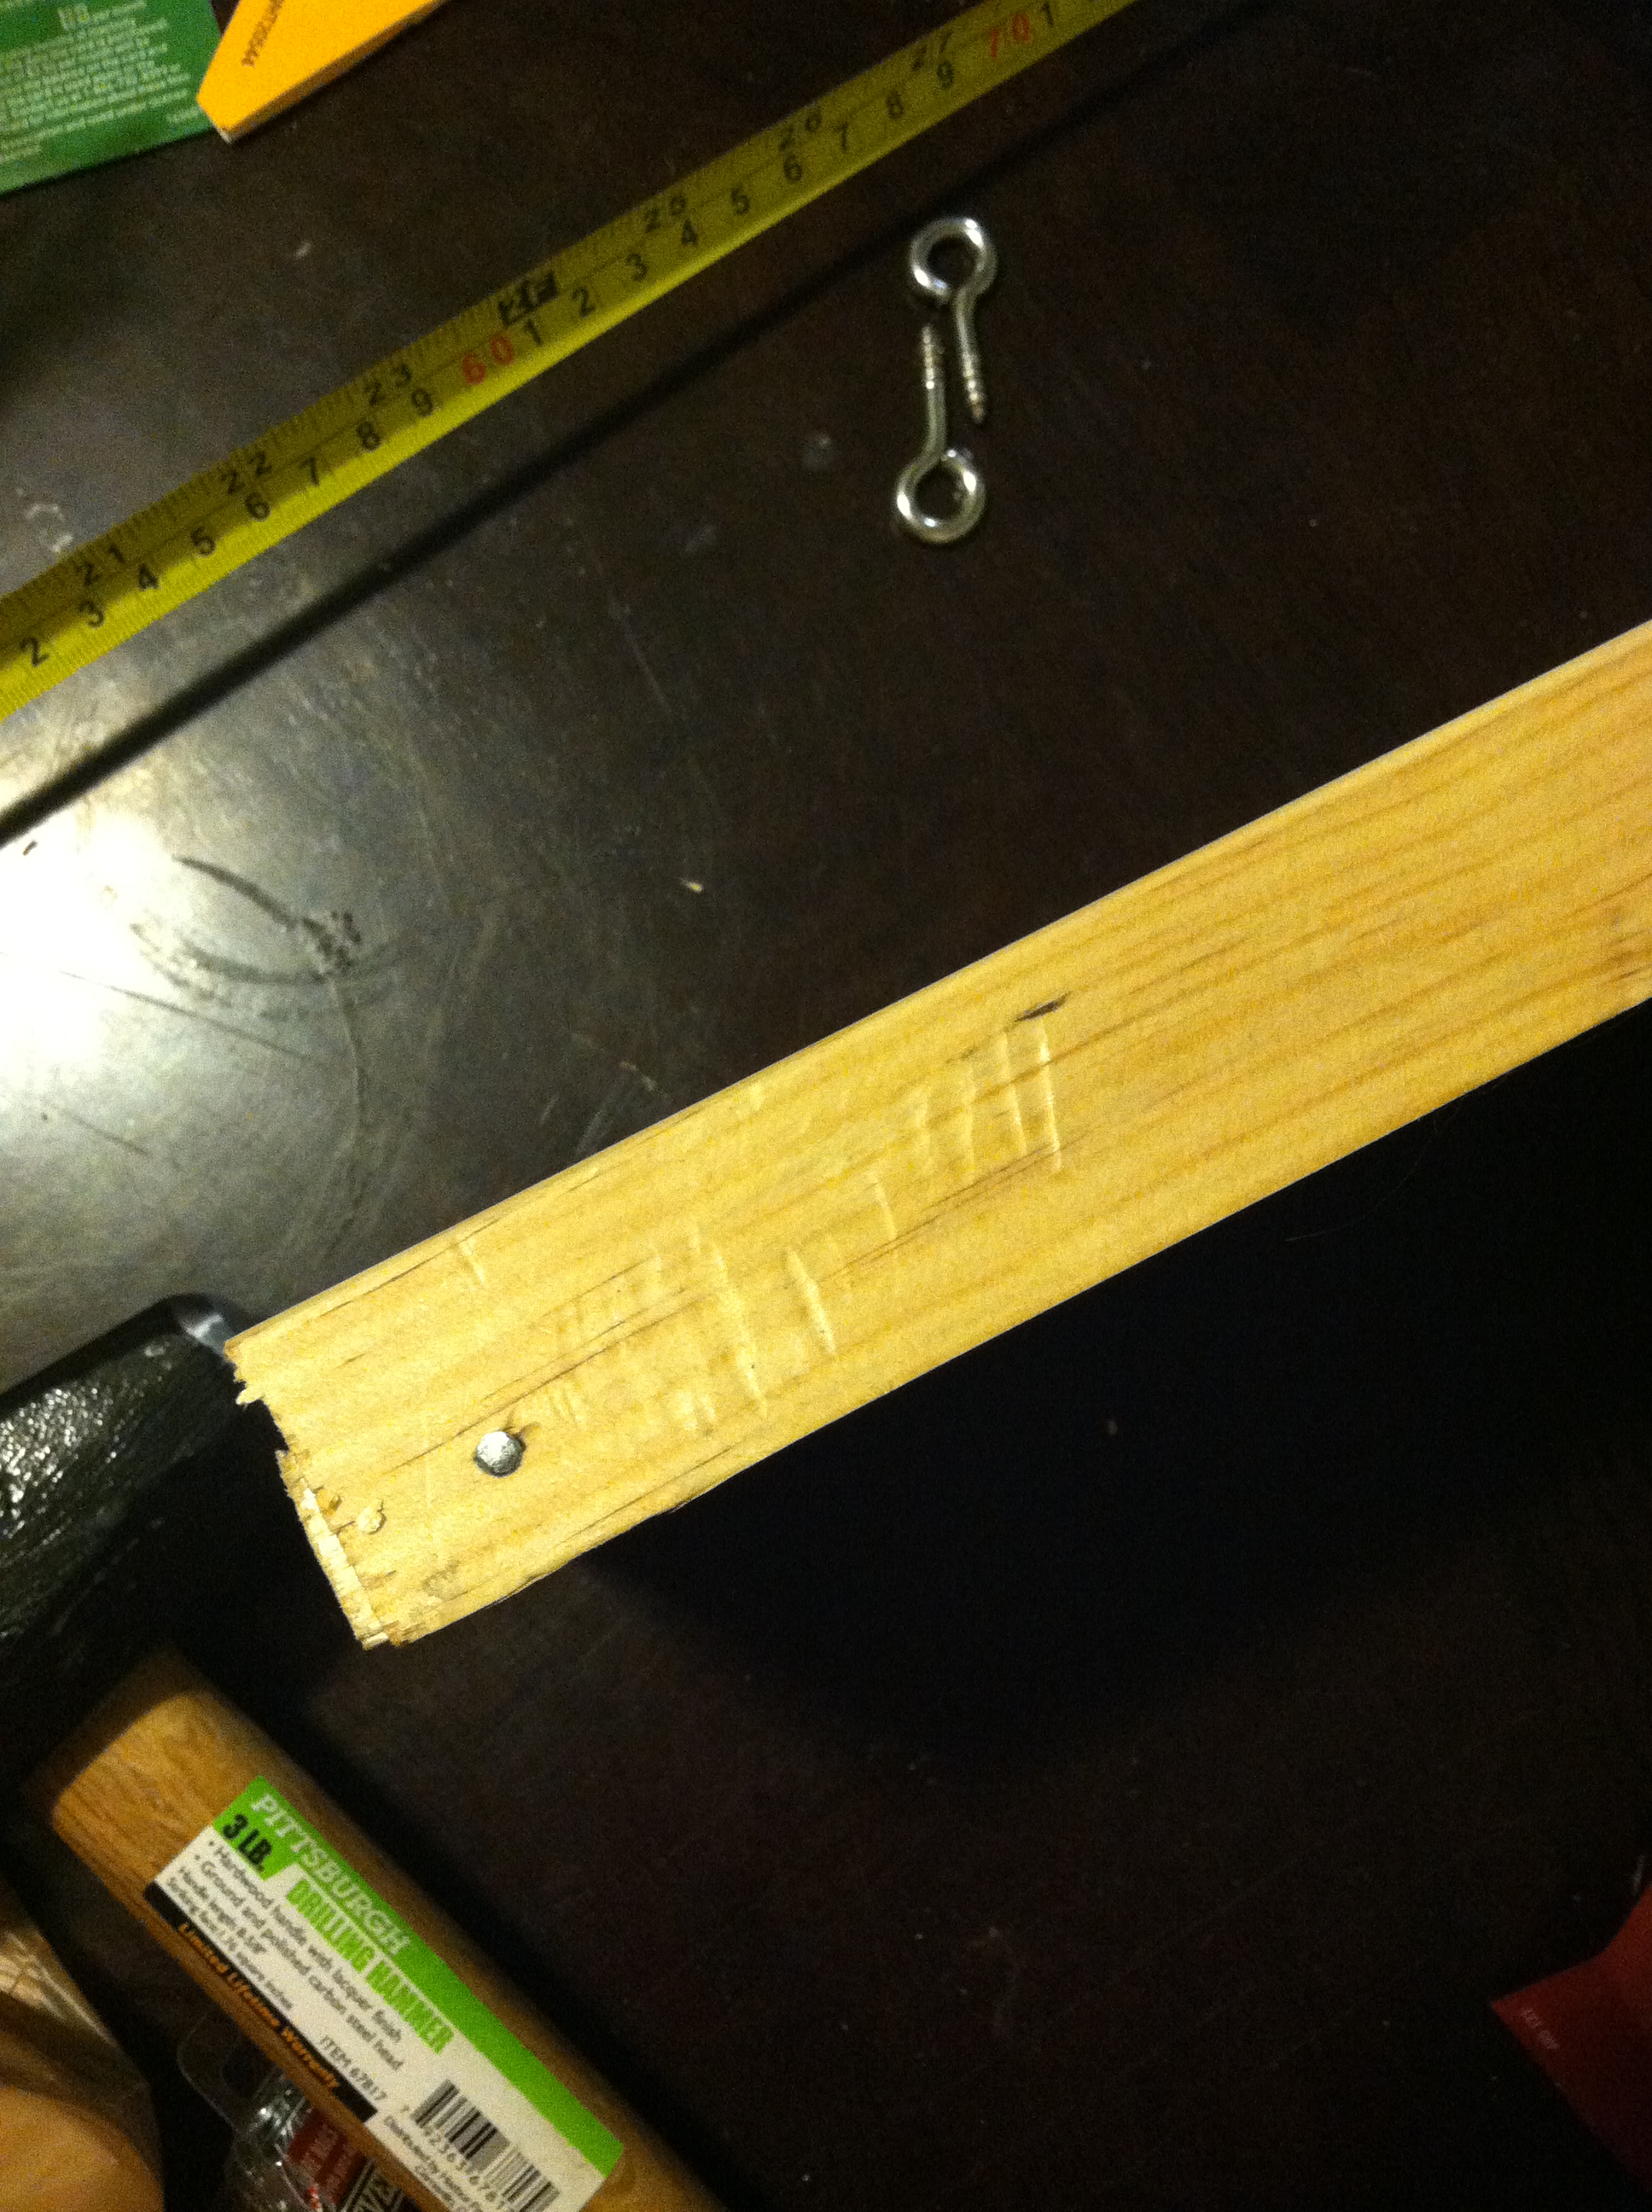
- 4 1.5" wire nails
- 4 screw eyes (mine were #208 but I don't know what that means: get a medium size)
- 2 Large screw hooks (again, these were #6 and I don't know what that means. Get BIG, these are to support the entire shelf from the window's top stud so they should be nice and sturdy).
- about 12 feet of medium gauge wire (Between gauges 8 and 14 - should be malleable by hand with some effort). The measurement of this is based upon how low you want the shelf to hang from the stud - to get the measurement for your project, measure from the top of the window down to where you want the shelf to sit and then multiply by 4 and add a foot or two just for insurance.
Instructions:
- Measure your window opening. Mine is 36.5" so I made my shelf 35" so as to give it some space on each side as a buffer area.
- Measure your pieces of wood and cut them to the appropriate size.
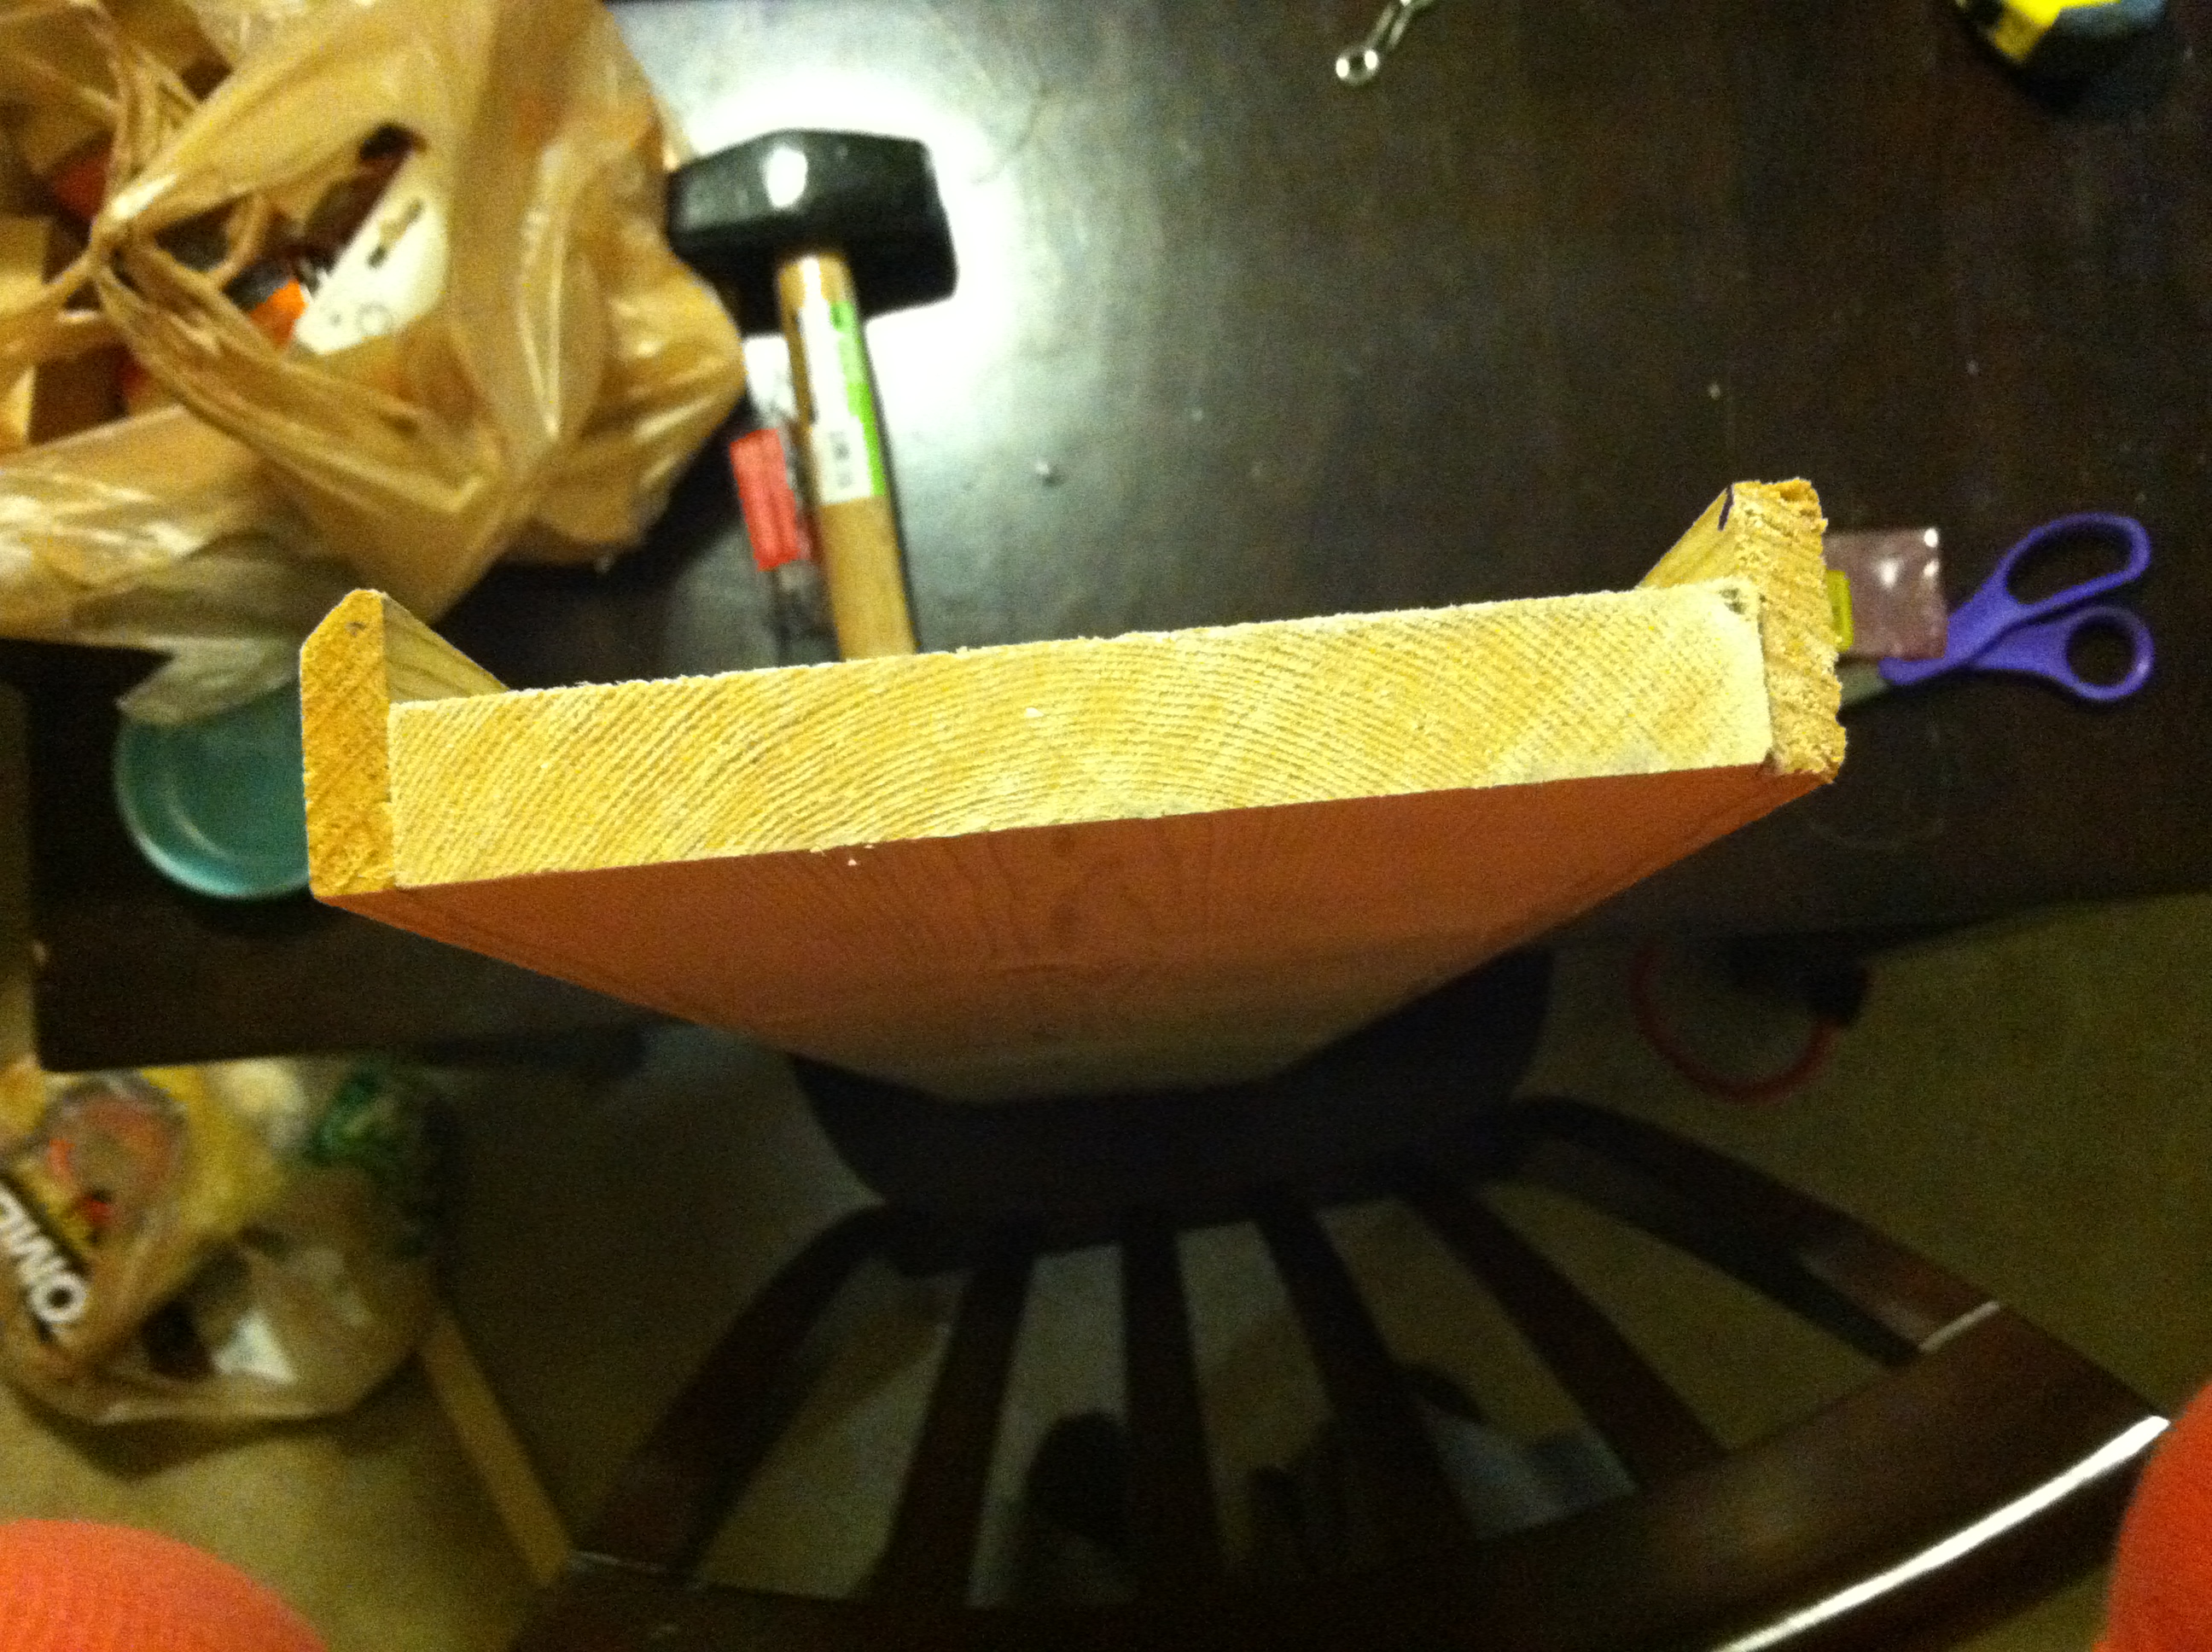
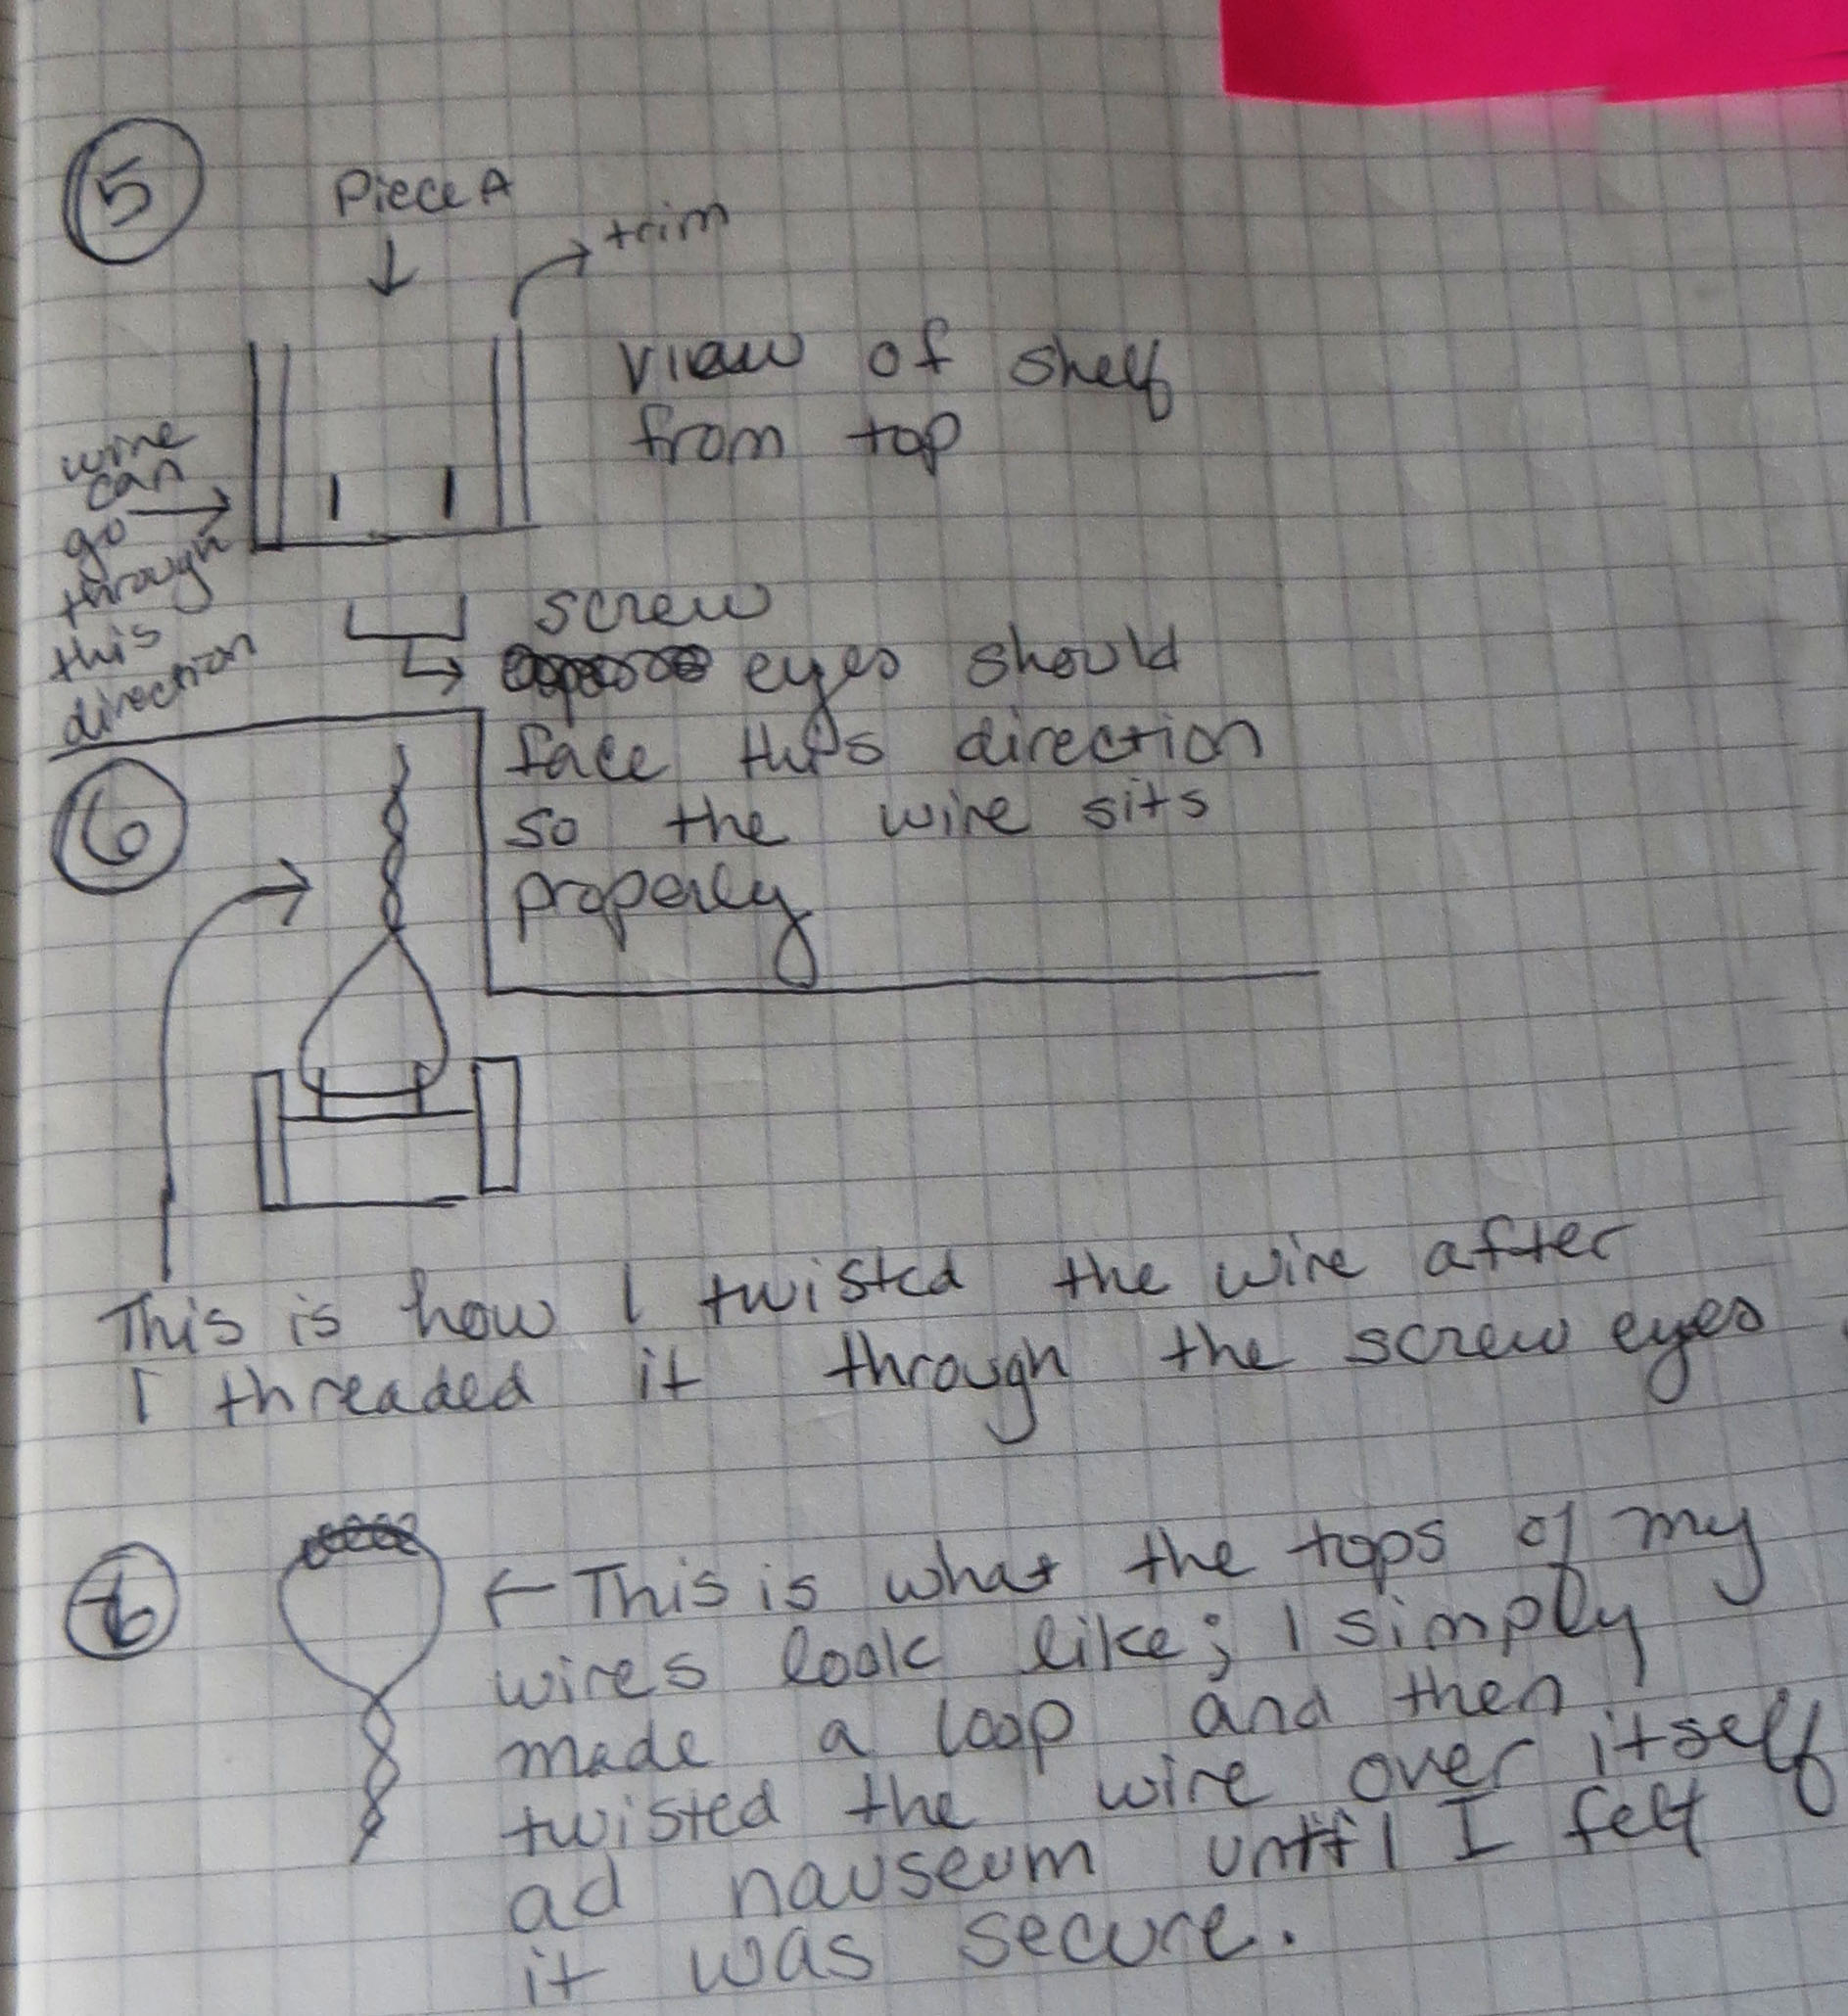
- Line up one piece of trim flesh against one long side of your main piece (Piece A) so that the side which will be the bottom of the shelf is flesh but the side which will be the top of the shelf has a lip on it. This is to prevent anything from accidentally slipping off the shelf it gets jostled too much or there's water or dirt spillage. Hammer in the nail on one end and then do the same on the other end. (Experts would probably say you should glue first and then let that set a moment and then clamp and nail. Whatever, I'm impatient, just nail it. This is a shelf, not the Taj Mahal). Repeat this process on the other side of your Piece A keeping in mind that both lips must be on the same face of Piece A and that the whole bottom should be able to sit flesh against your work bench when you're done (also, I use "work bench" liberally: I used the kitchen table to work on this project). We will call the side with the ledges the "Top" and the side which is flesh across the "bottom."
- You can paint now if you like. I ended up painting at the very end (well, more like 2 weeks later...) but if you want your hardware to remain it's original metallic color, this would be the best time to paint. Let it dry before moving on to the next step. If you are not painting now, move to part 5.
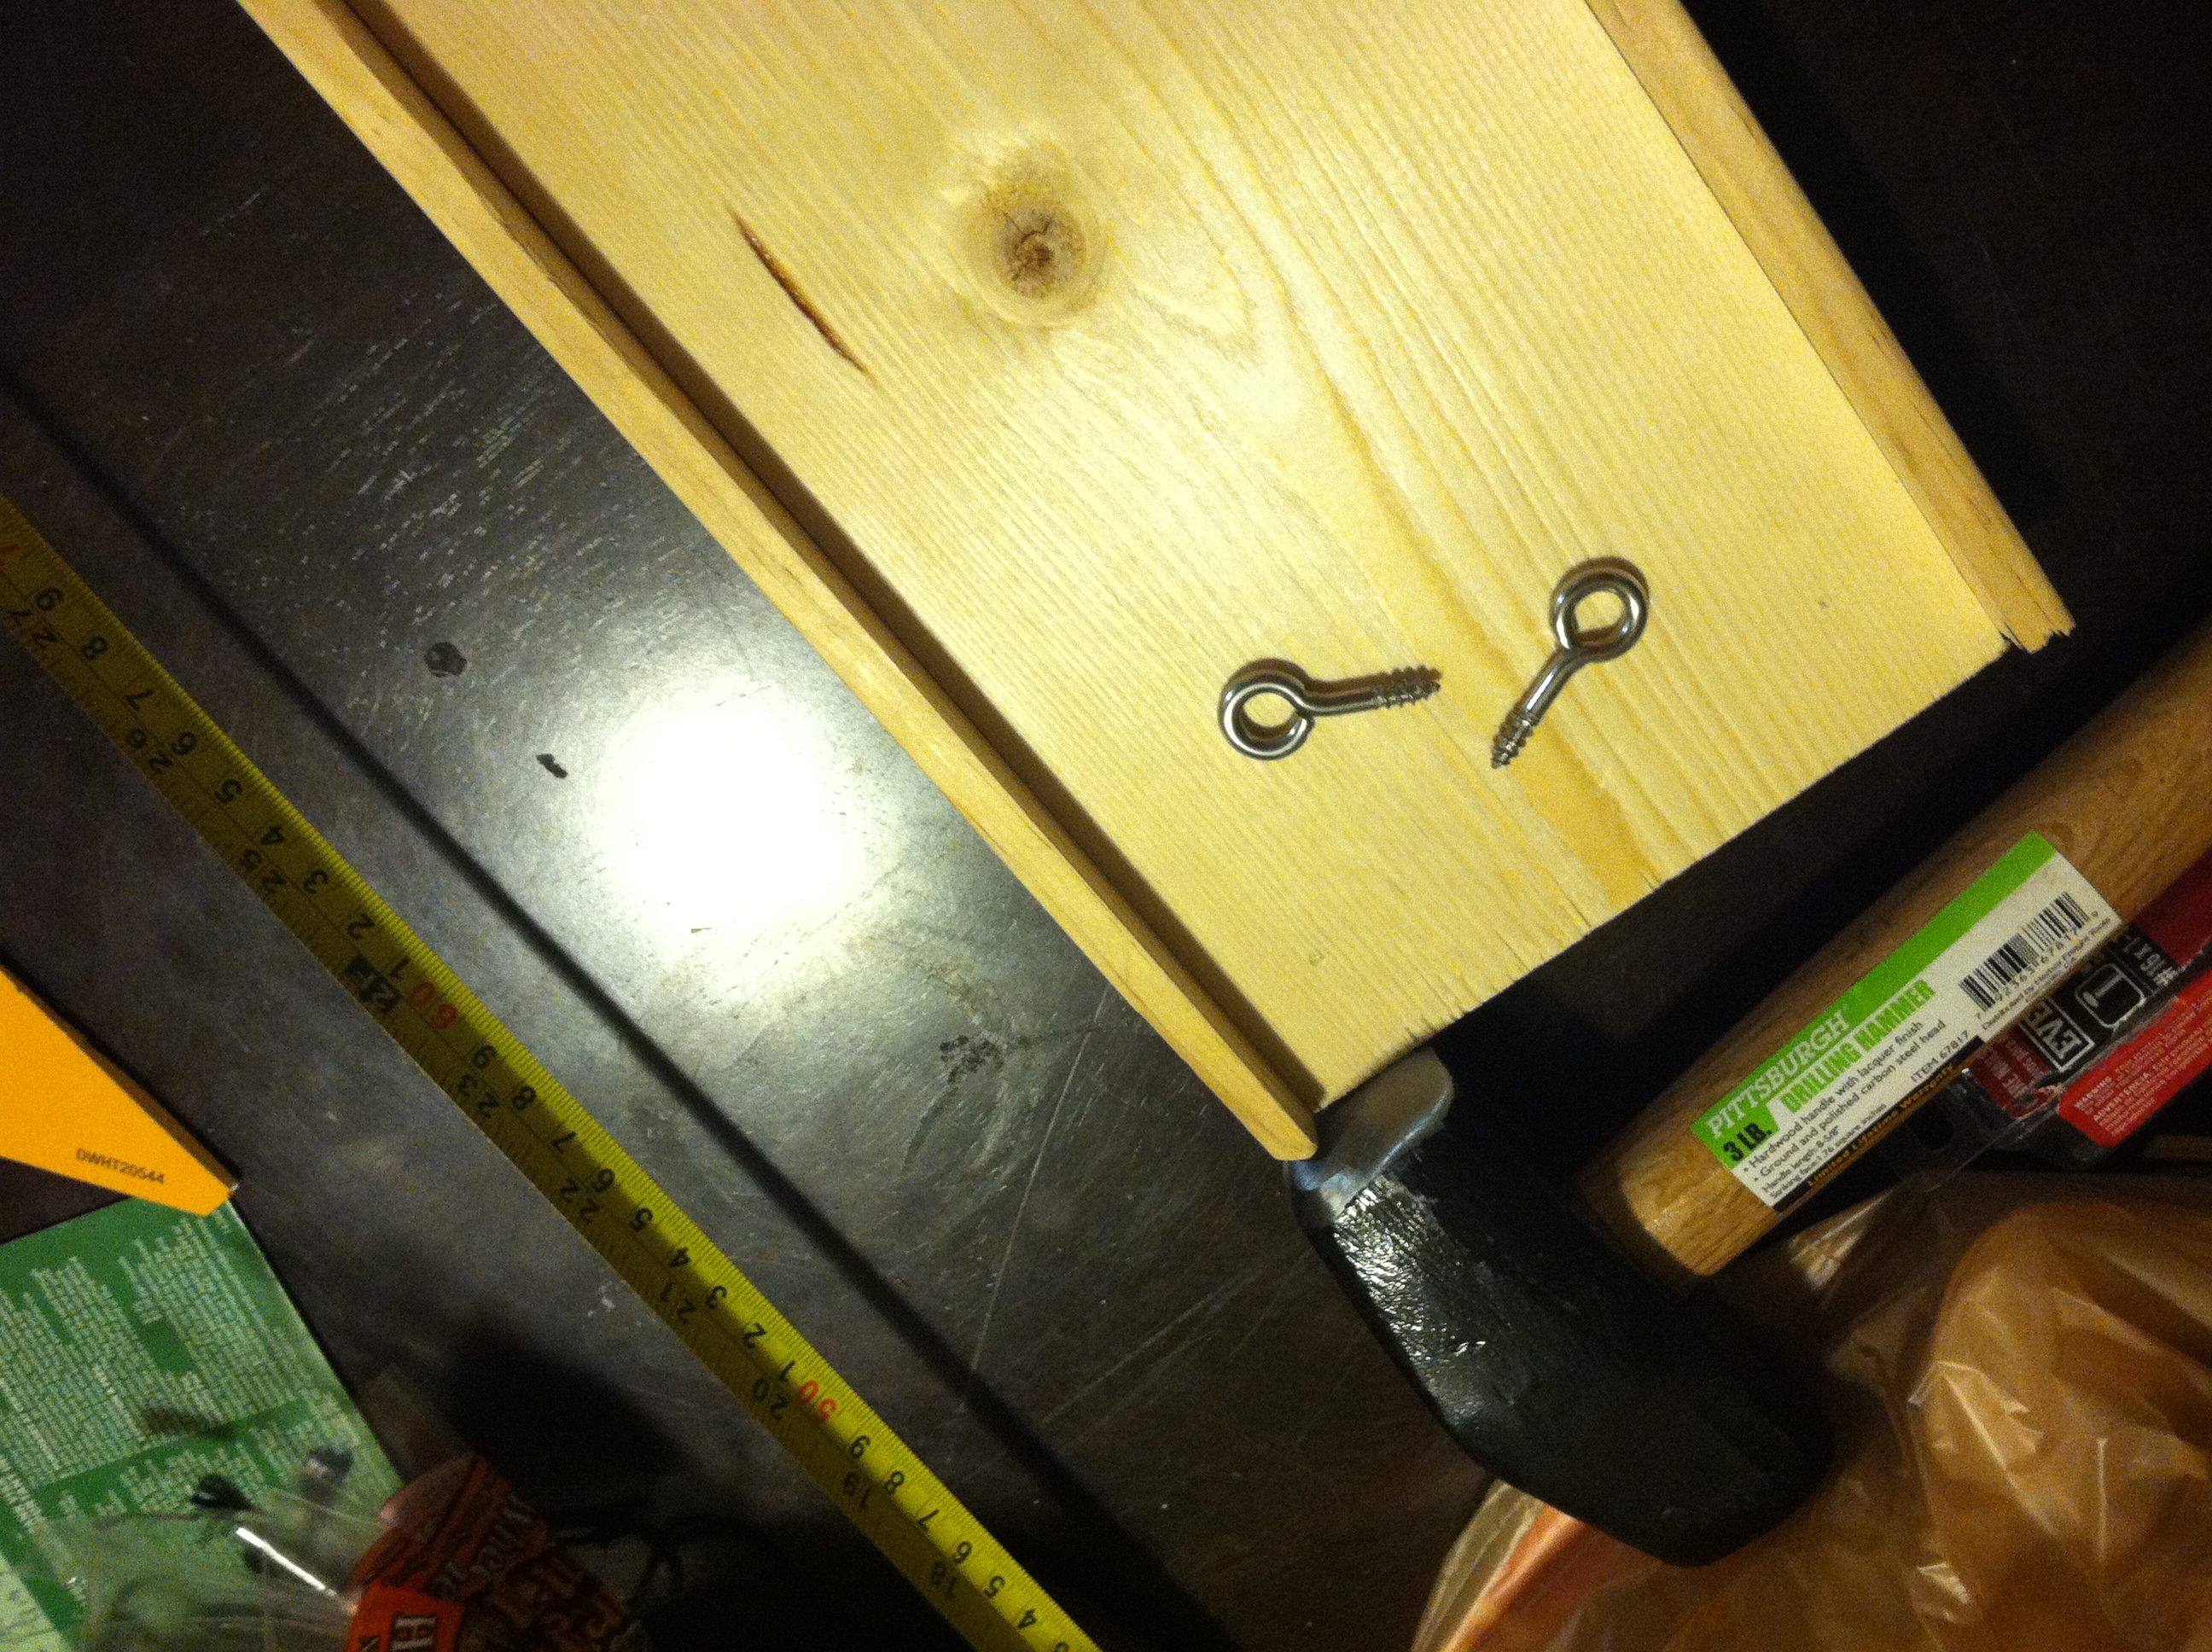
- Measure 1 inch in from the top of the open side of Piece A and 1 inch in from the very outside edge of the trim on the top and mark. Do this on all four corners on the top. These four spots are the places you will screw in the screw eyes. Once you've measured appropriately, screw in your screw eyes. It is most helpful to have the open parts of he eyes lined up so that the wire can go through perpendicular to the direction of the shelf.
- Measure out the amount of wire you will need (as per the note in the hardware section concerning wire). It does not need to be exact but erring on the side of having too much is a good idea. You can always cut off the excess. Thread the wire through the screw eyes and begin twisting the ends together from about 6 or so inches up from the screw eyes. Continue until you get the desired length, leaving enough slack to create a loop at the end to be used to hang the shelf. See the diagram for a bit more clarification. I tugged on the loop a few times to ensure it was secure and pushed on the very ends with pliers so I knew there were no wire ends poking out. Do the same on the other side, working to ensure that when the wires are hung up, they make the shelf level. This is a bit tricky but the nice thing about twisting the wire is that if there is a bit of error, you can always twist or untwist the wire on one side to level out the shelf slightly. If it's a severe difference, you may need to completely redo one side.
- Now that your shelf is done, find the stud in the top of the window frame. Measure the space between the eye hooks on opposite sides of your shelf and mark on your window frame where the screw hooks will go (the object being that the hooks will hold the wires perfectly vertical so there is no angling of the wires). Additionally, make sure that there is enough space between the hook and the window so that when the shelf is suspended, it will not hit the window panes nor jut out substantially from the window frame. Our windows had a whole lot of drywall and then finally finally I got to the stud so I used an electric drill with a bit slightly smaller than my screw hooks to start the holes in the frame. It made it much easier, especially considering the angle at which the hooks have to be screwed in. Once fully in, tug on them a bit to ensure they can hold some weight. If they come tumbling out with just a small amount of force, you're probably still in the drywall and need to go further to get into the stud.
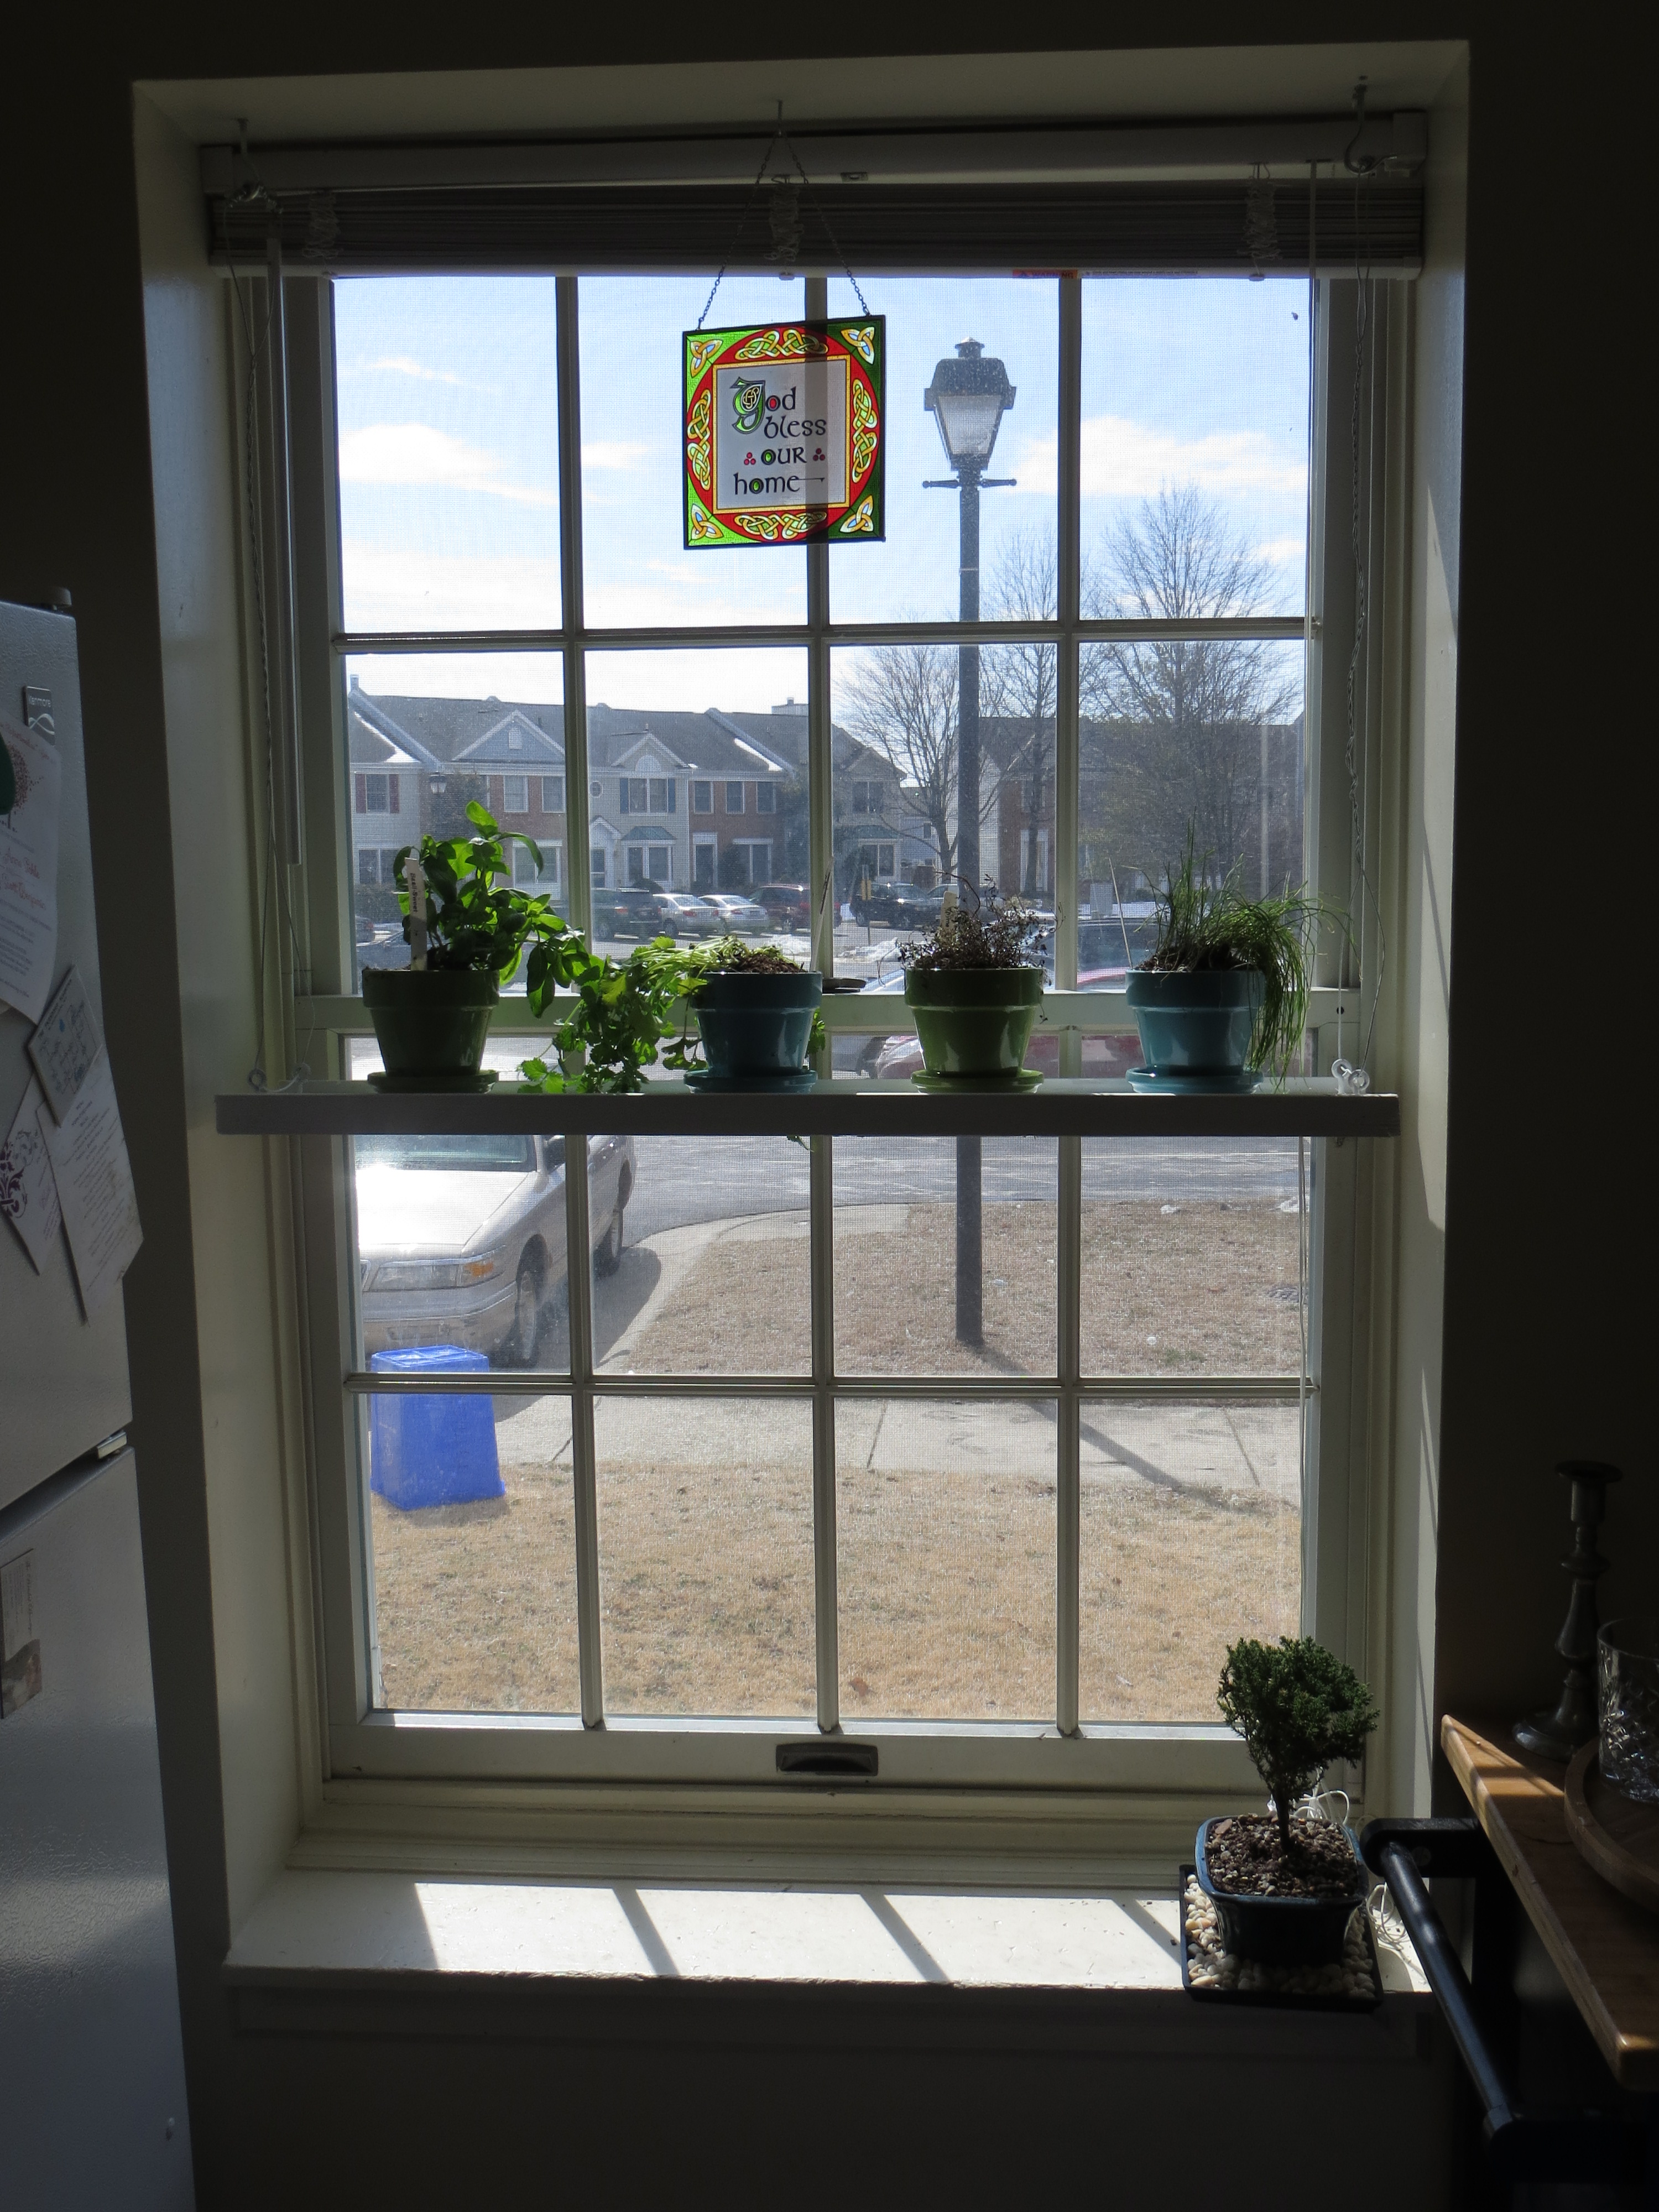
Once the hooks are in, you can just hang it up and put your plants on it!
Notes on Painting and Staining.
So I let mine stay in the window a few weeks before painting it for timing purposes and because I wanted ot make sure it actually worked the way i wanted. It did so I brought it outside and spray painted it white. Well i ran out of spray paint so i ended up just using white Acrylic. Both seemed to work well, the acrylic seemed to cover a bit better and since the wood is overall smooth, I didn't have any problems with the acrylic. Still, there was a layer of spray paint underneath it which helped me deal with any knots in the wood from gunking up he acrylic paint.
You could also stain the wood if you like (although I don't know anything about staining, I imagine it's not much different from painting.)
So there you have it. I'm very happy with my little project and I think Bailey is too! Happy Crafting!